Build your first form
This guide takes you from a blank canvas to a live, shareable Droplet form with a real approval flow behind it. Follow it end to end and you will have something you can send to people today. Plan for about 20 to 30 minutes your first time through.
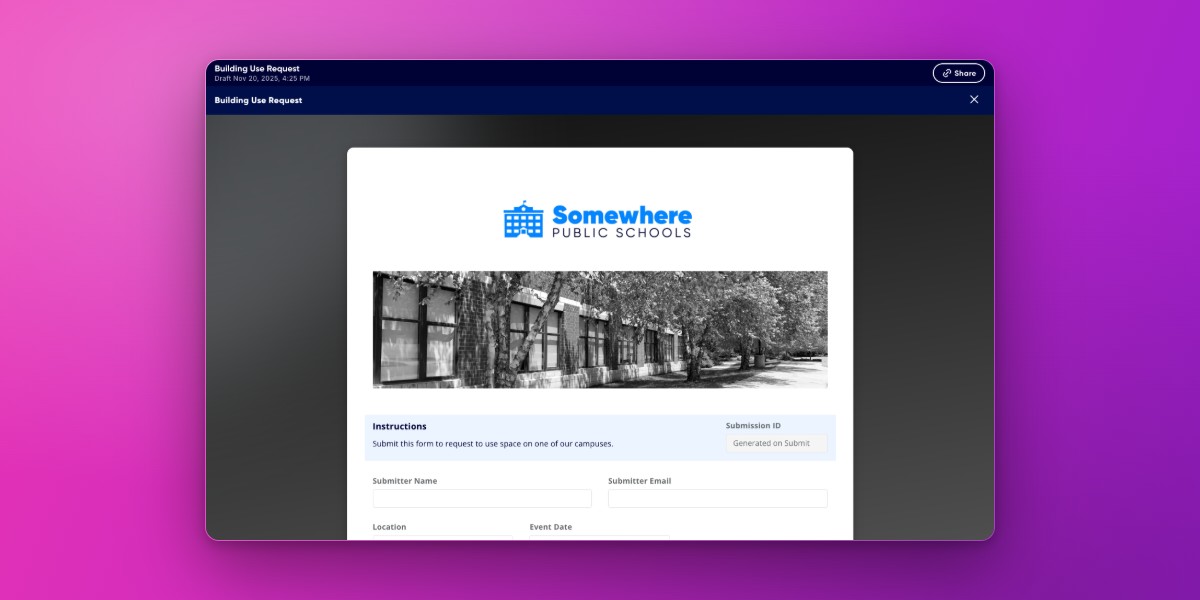
There are a couple of ways to learn this, and they cover the same ground. Pick whichever fits you:
Read along here. This is the self-paced walkthrough, broken into seven short parts.
Take the course. The hands-on Build a Form course in the Droplet Community builds one with you, step by step.
Before you start
A couple of quick things to have in place:
You are signed in to Droplet.
Your account is allowed to create forms. If you do not see a way to start one, check with your Droplet administrator about your role.
A rough idea of what you want to collect. We will shape it together in step one, so a sticky note of fields is plenty.
What you'll do
Seven short parts, in order. Each one builds on the last:
Plan what you need to collect and who needs to act on it.
Create the form.
Add your fields with components.
Add logic so the form reacts to what people enter (optional).
Set up the workflow so submissions route to the right people.
Preview and test it end to end.
Publish and share your form.
1. Plan what you need
A few minutes of planning here saves a lot of rebuilding later. You do not need a perfect spec, just answers to three questions.
What are you collecting? List the questions you need answered. Mark which ones are required and which are optional. Group related questions together, those groups will become sections on your form.
Who fills it out? Anyone with a link, or a specific set of people? This affects how you share it later.
What happens after someone submits? Does it go to one person for approval, or move through several people in order? Who needs to be notified at each point? This is your workflow, and it is the part most people forget to plan.
Keep your first form small on purpose. A handful of fields and a single approval step is the perfect size to learn the whole flow. You can always add more once you have the rhythm.
For the rest of this guide we will build a simple example, a Building Use Request, so you can see how the pieces fit together. Swap in your own questions as you go.
2. Create your form
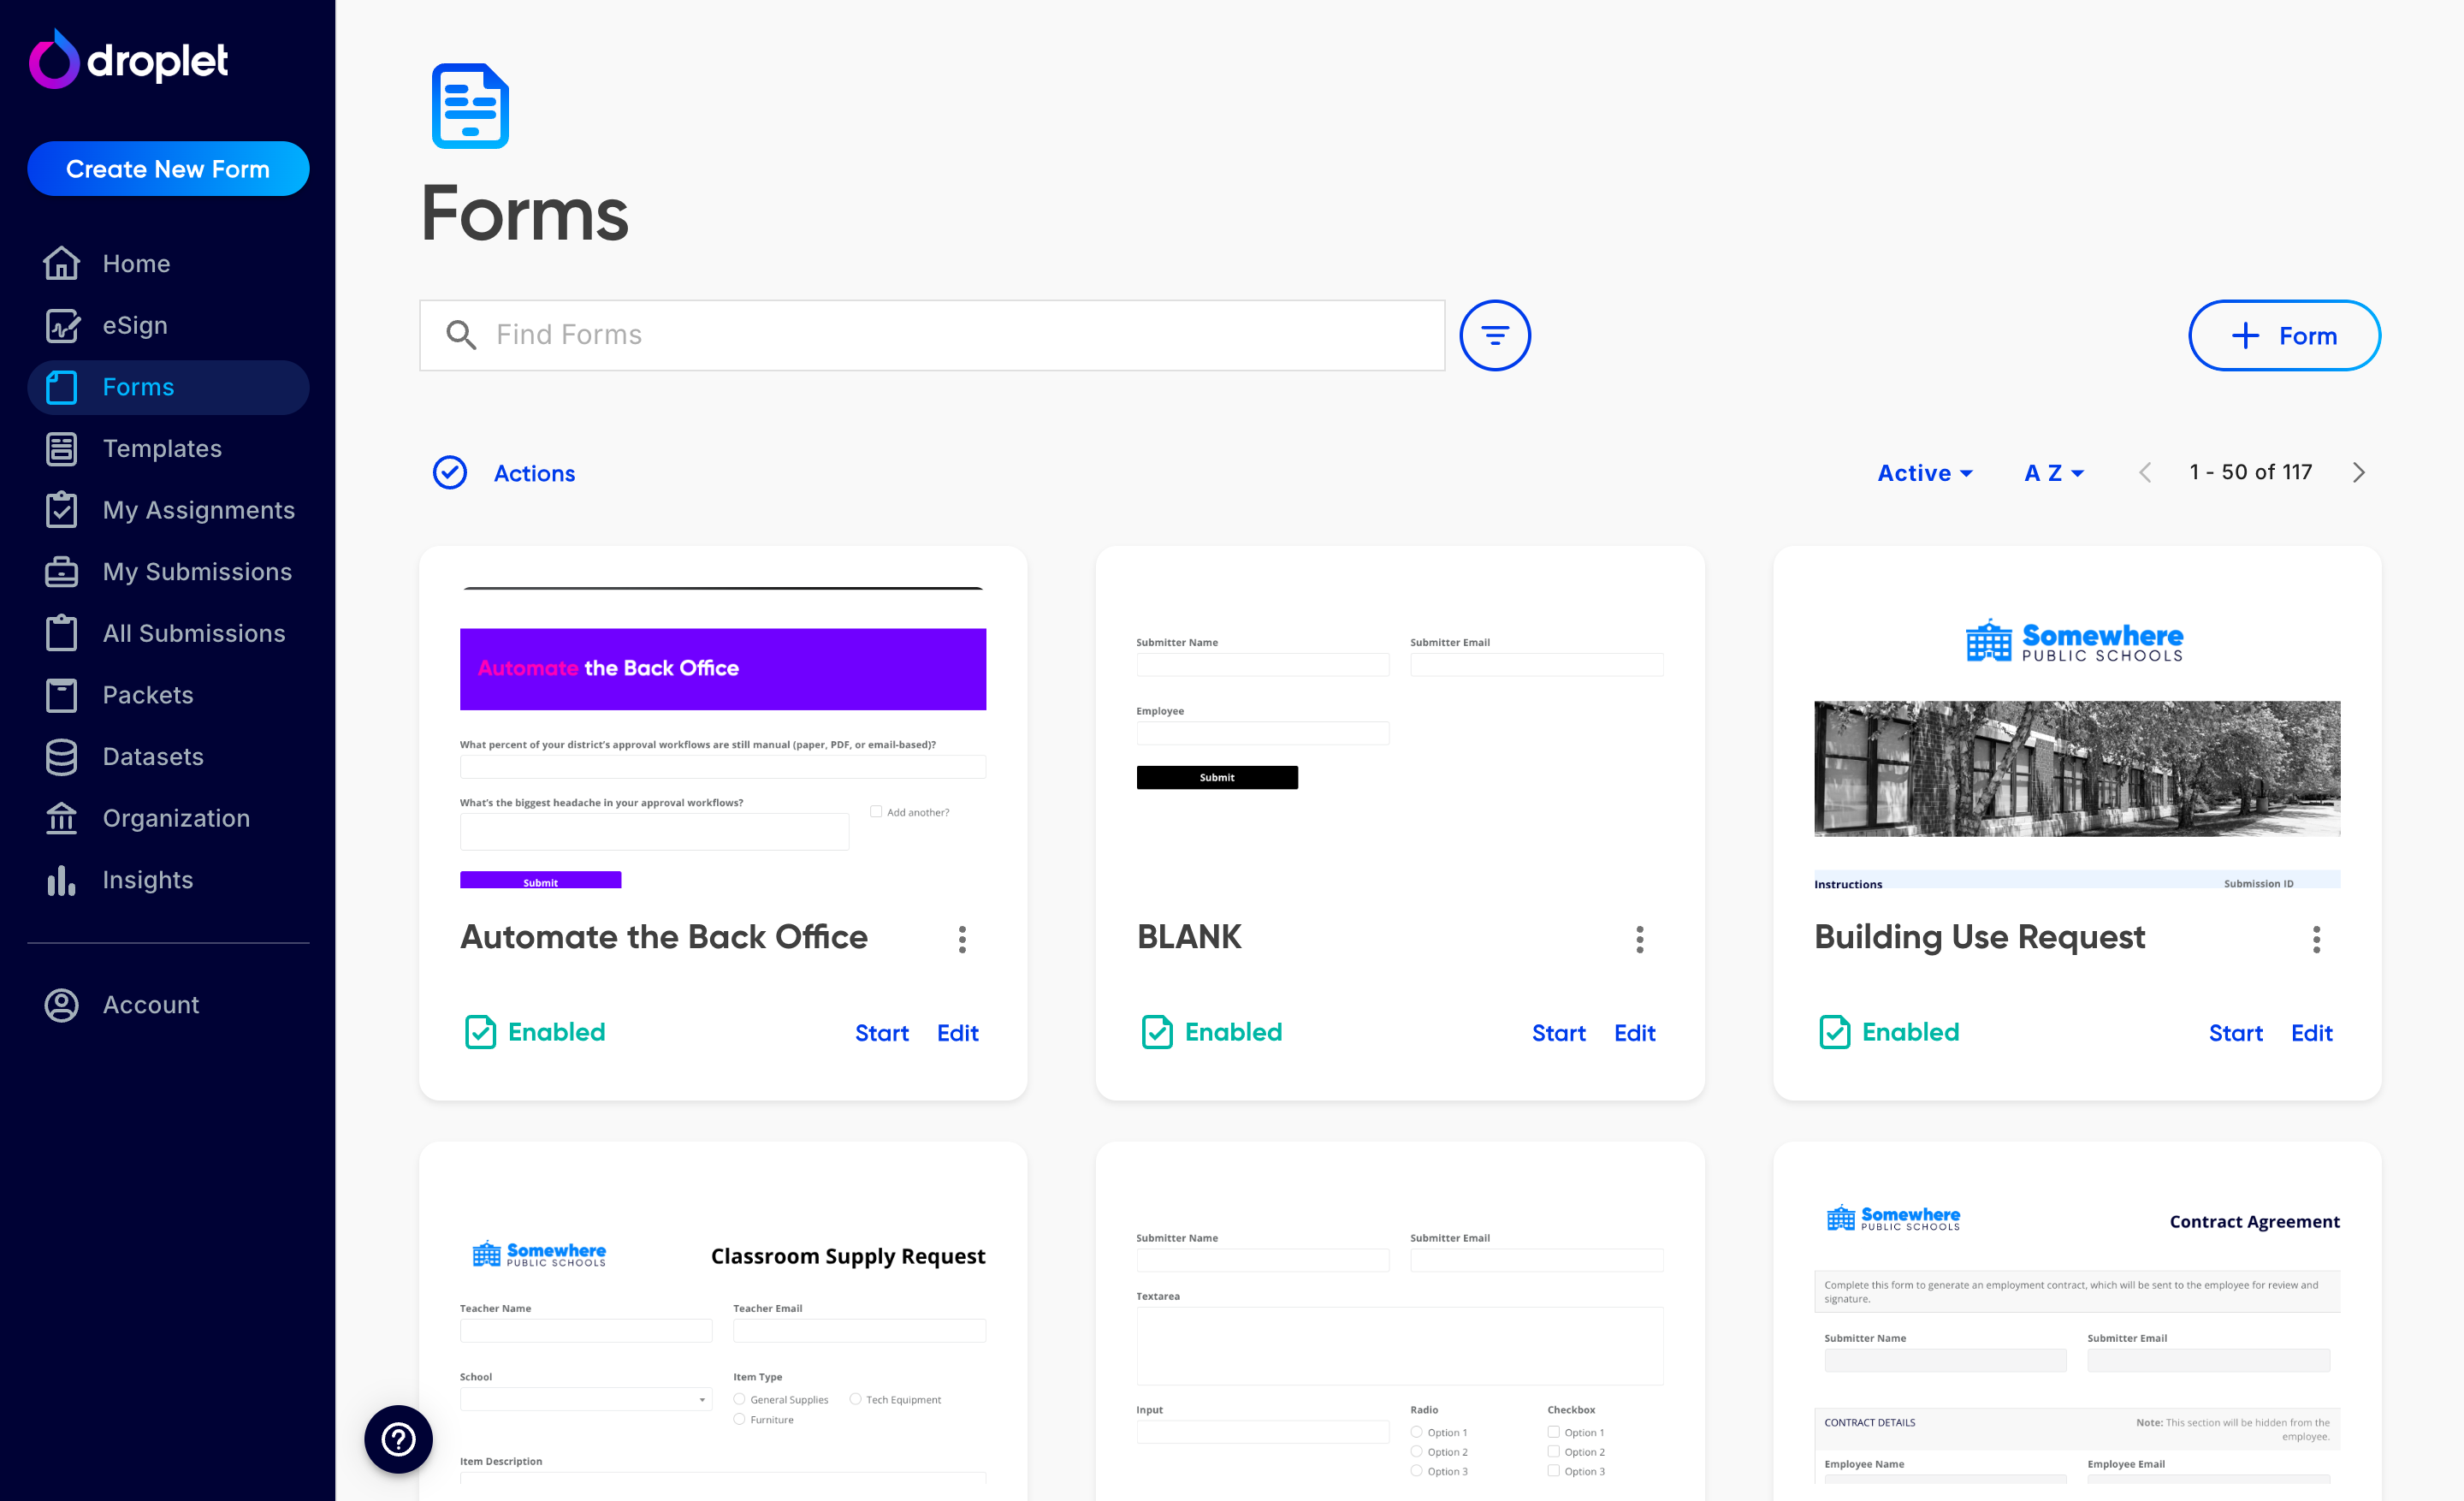
Everything starts on the Forms page, which is home base for all of your forms.
Go to the Forms page from the main navigation. This is where every form you create lives, along with its status and submissions.
Click Create New Form in the left sidebar, or + Form on the Forms page. Droplet opens the form builder with a blank canvas.
Give it a clear, recognizable name like "Building Use Request." This is what people will see, so make it obvious.
Droplet keeps your changes in a draft as you build, so make sure to click save in the upper right hand corner.
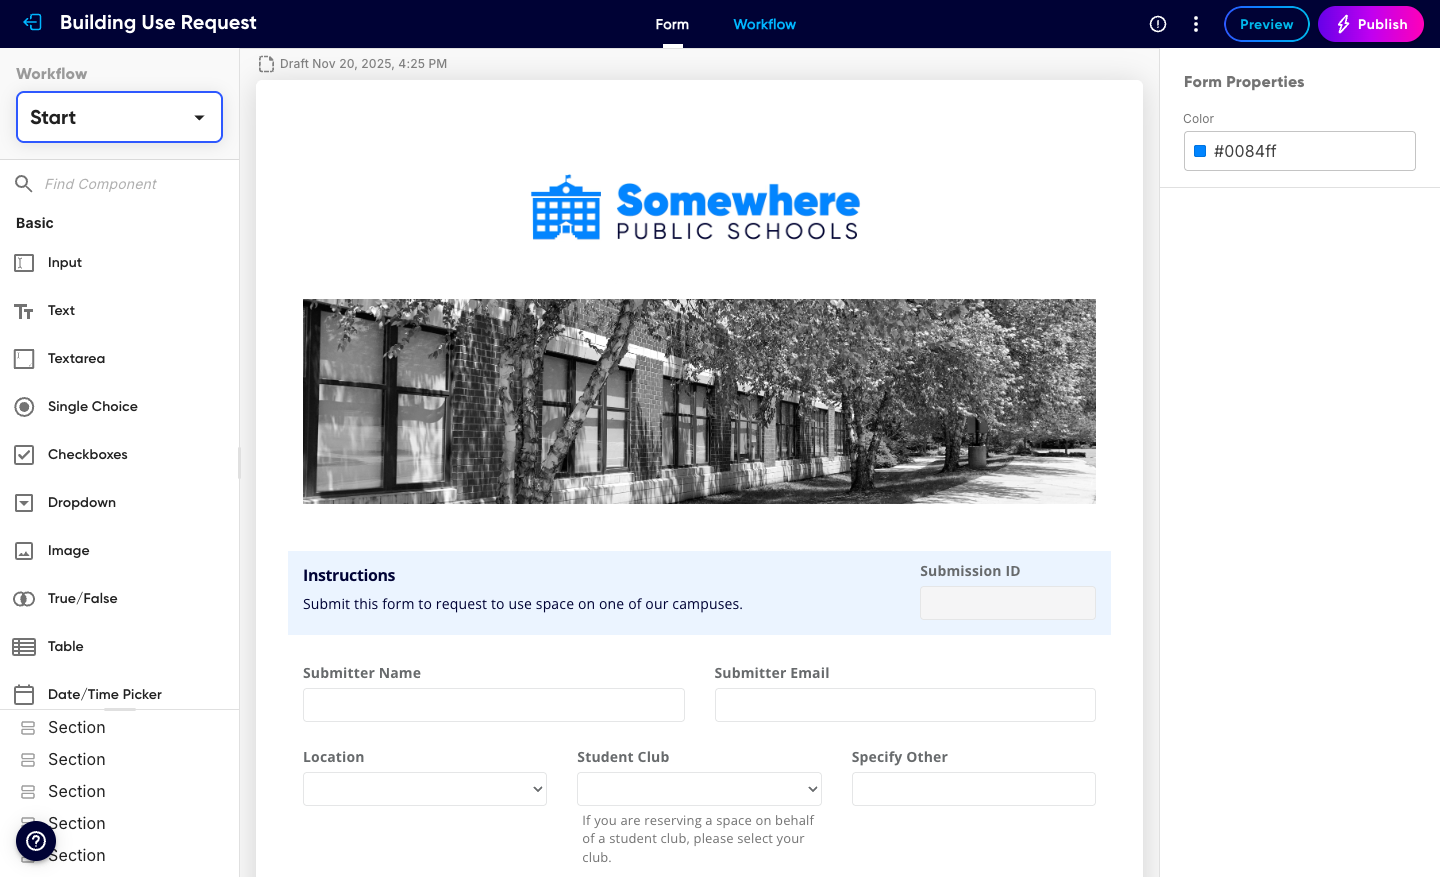
You are now in the form builder. The middle is your canvas, and the side panels hold the building blocks and settings. For a full tour of every part of the builder, see Create and edit a form.
3. Add your fields
Fields in Droplet are called components. You add them to the canvas, then click any one to set its label, whether it is required, and its options. Build your form top to bottom, the way a person will fill it out.
Start with a layout component to create a section, so related questions are grouped and the form is easy to scan.
Every form needs to know who submitted it. Droplet automatically starts every form with a submitter name and submitter email; while these are required in every form, you can edit the label to best fit your form.
Drop in the components that match each question: text inputs for names and free text, choice components for dropdowns and multiple choice, and date or file components as needed.
Click a component to set its label, mark it required if an answer is mandatory, and add its options. Clear labels and helper text make a form far easier to complete.

Required fields are the simplest way to make sure you get complete responses. A form will not submit until every required field is filled in.
4. Add logic (optional)
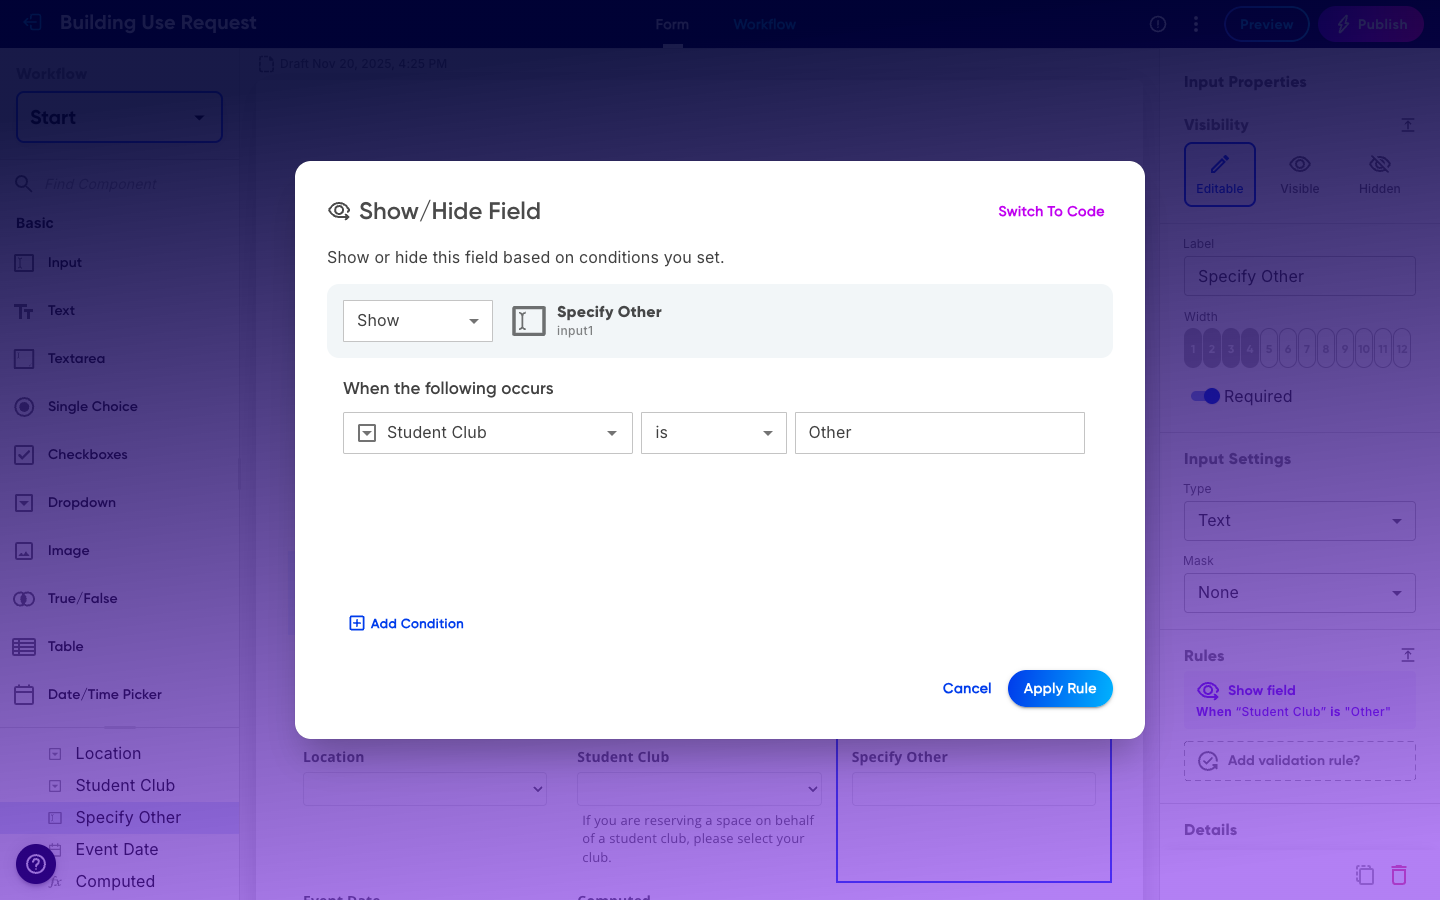
Once your fields are in place, you can make the form smarter so people only deal with what is relevant to them. This part is optional for your very first form, skip it if you would rather keep things simple to start.
Show or hide fields based on earlier answers. For example, only show a "Number of chaperones" field if the trip is overnight. See Show/Hide field rules.
Validate input so mistakes get caught before submission, like requiring a future date or a number within a range. See Validation rules.
5. Set up your workflow
The workflow is what happens after someone hits submit: who reviews it, who approves it, and who gets notified along the way. This is what turns a form into a real process. Switch to the Workflow tab at the top of the builder.
The Workflow tab is a visual canvas. A Start step and a Completed step are there by default, and you add your review steps in between, connected by arrows. The left side shows a live test panel for trying the form as you build; collapse it with the toggle at the top-left of the canvas to give yourself more room.
Create one step for each person who needs to review or approve the submission, in the order they should act. For our example that might be the teacher, then the principal.
Point each step at the person or role who should handle it. You can assign to a specific person, or to whoever holds a role.
Add a notification so each assignee gets an email when it is their turn. This is the difference between a form people forget about and one that keeps moving. See Workflow notifications.
Choose where a finished submission lands, for example marked approved, or sent back for changes if a reviewer rejects it.
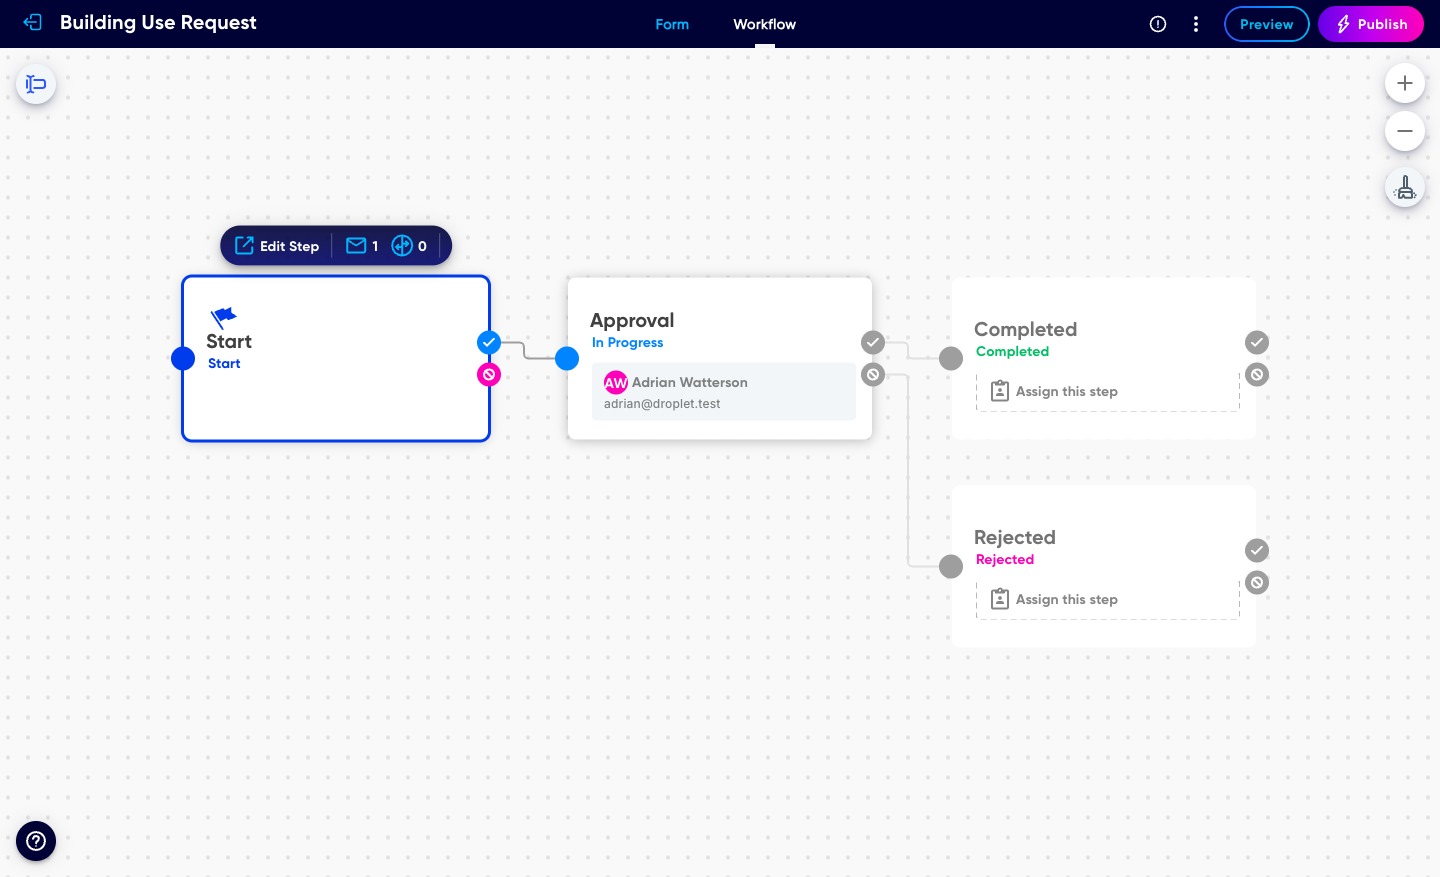
Workflows can do a lot more than a simple line of approvals, including parallel reviews and conditional routing. Start simple here, then see Configure workflows when you are ready to go further.
6. Preview and test
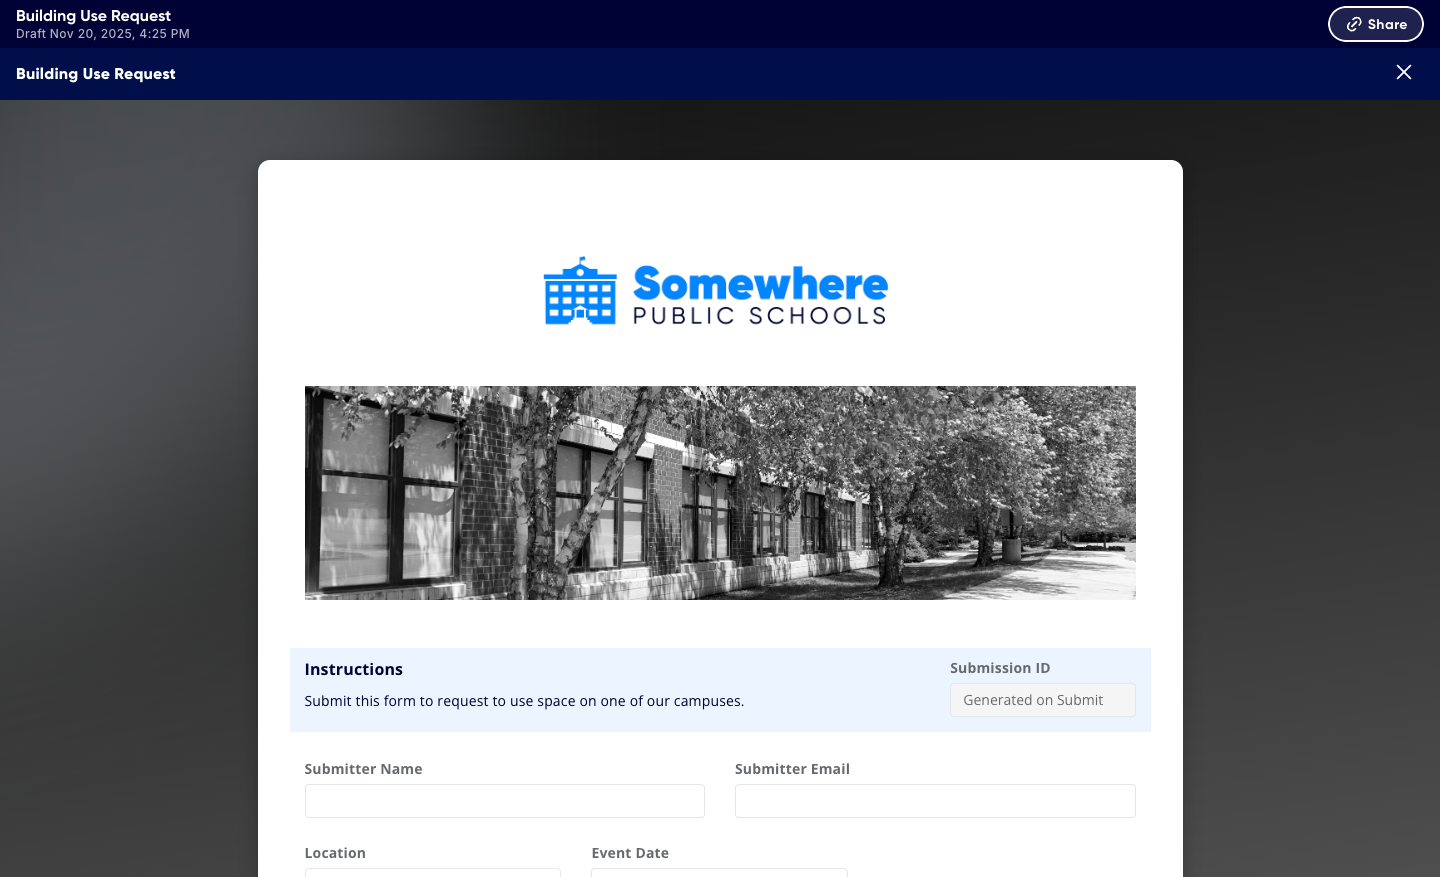
Before anyone else sees it, run through the form yourself. Click Preview to fill it out exactly as a real person would. Check that the fields behave, that show and hide rules fire when expected, and that the workflow routes the way you planned.
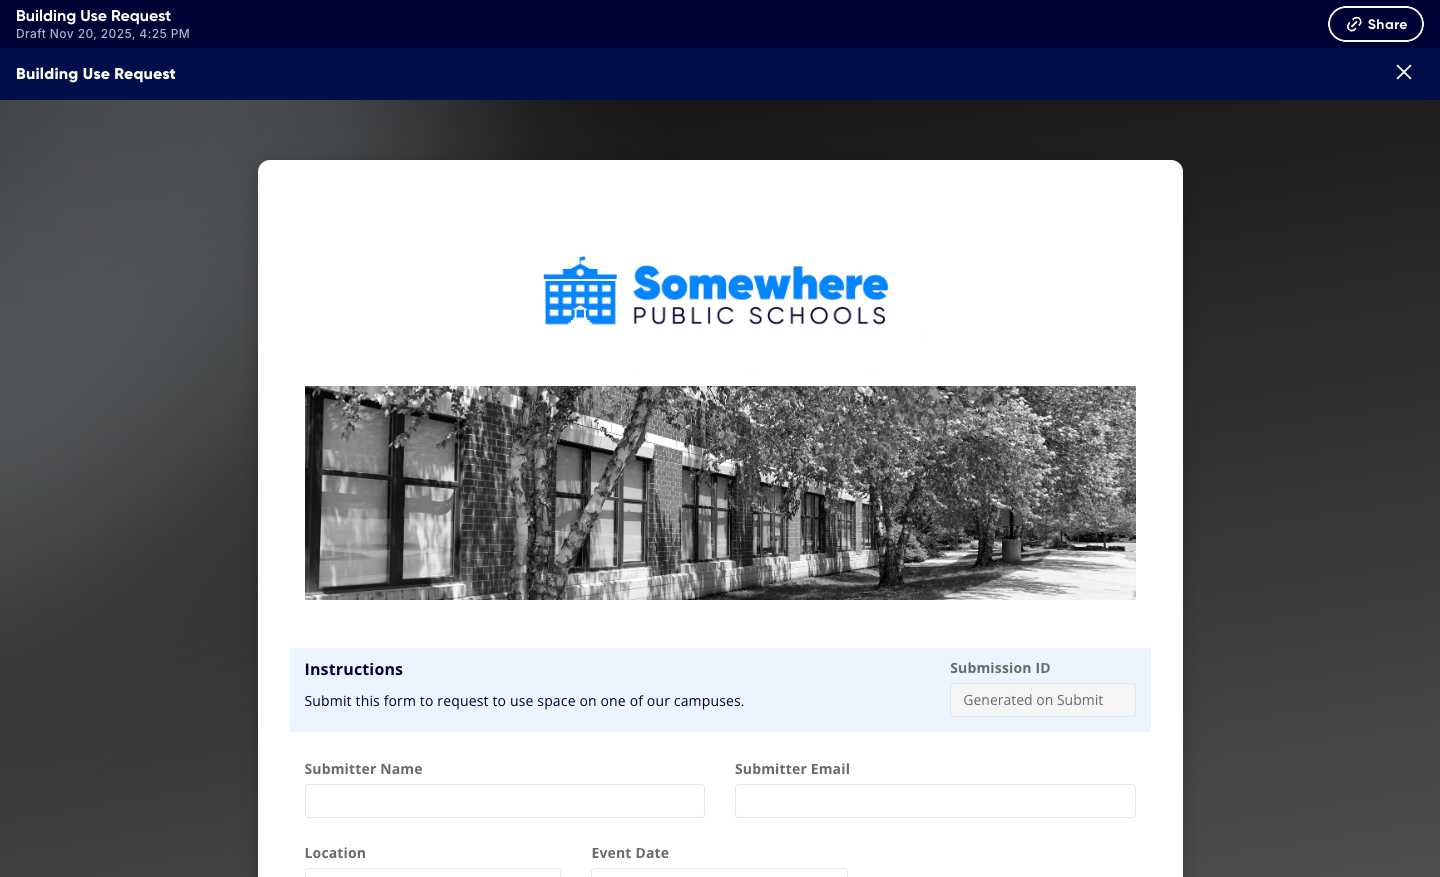
Notifications do not send while you are in Preview. To test the emails for real, publish the form and run one live test submission with a colleague before you share it widely.
7. Publish and share
When it looks right, publish your form to make it live, then get it in front of people.
Publishing makes the form active and ready to accept real submissions.
Copy the form link to send by email or message, or grab the embed option to place it on a web page. See Share a form link for every option.
Submit once yourself, or with a colleague, to confirm the emails and routing all work end to end.
If another district could use your form, export it as a .drplt file and run it through the Share Check first. It swaps staff names, emails, and phone numbers for placeholders so the copy you pass along is safe to share.
As responses start coming in, you will track and act on them from the submission views. View and filter submissions and Take actions on submissions pick up exactly where this leaves off.
Common questions
Can I change a form after it is published?
Yes. You can keep editing a live form. Big structural changes are easiest before you have a lot of submissions, so get the shape right early when you can.
Do people need a Droplet account to fill out my form?
It depends on how you share and configure it. Many forms can be completed from a link without an account, while internal workflows often involve people who are signed in.
What if I need more than one approver?
Add a workflow step for each one, in order. For reviews that happen at the same time, see parallel steps in Configure workflows.
How do I see who has and has not responded?
Track everything from the submission views. See View and filter submissions.
Keep learning
That is a complete form, start to finish. When you are ready to go deeper:
Take the self-paced Build a Form course in the Droplet Community.
Explore the Build Forms & Workflows guides for components, logic, and advanced workflows.
Learn how to fine-tune your notifications so the right people always know what to do next.