Control field visibility by step
Every step in a workflow is a different set of eyes. Visibility settings let you decide, field by field, what each step's person can see and what they can change: the submitter fills in their part, a reviewer reads it and adds theirs, and sensitive fields stay hidden from anyone who should not see them.

You set all of this right in the form builder, on the Form tab. There is no separate permissions screen: you pick a step, click a field, and choose how that field behaves for that step. This article covers the three visibility states, how steps map to the people in your workflow, and the two ways to set it.
This is different from a Show/Hide rule, which shows or hides a field based on answers someone gives. Step visibility is about who is looking at the form. The two work together, and we cover the difference near the end.
The three visibility states
Click any field on the canvas and the properties panel opens with a Visibility control at the very top. It has three states, and exactly one is always active for the step you are viewing.
| State | Icon | What the step's person can do |
|---|---|---|
| Editable | Pencil | See the field and change its value. Use this for the person whose job is to fill that field in. |
| Visible | Eye | See the field as read-only. The value shows, greyed out, but they cannot change it. Use this to show earlier answers for context. |
| Hidden | Crossed-out eye | Not shown at all. The field is absent from the form at this step, and its value is not visible. |
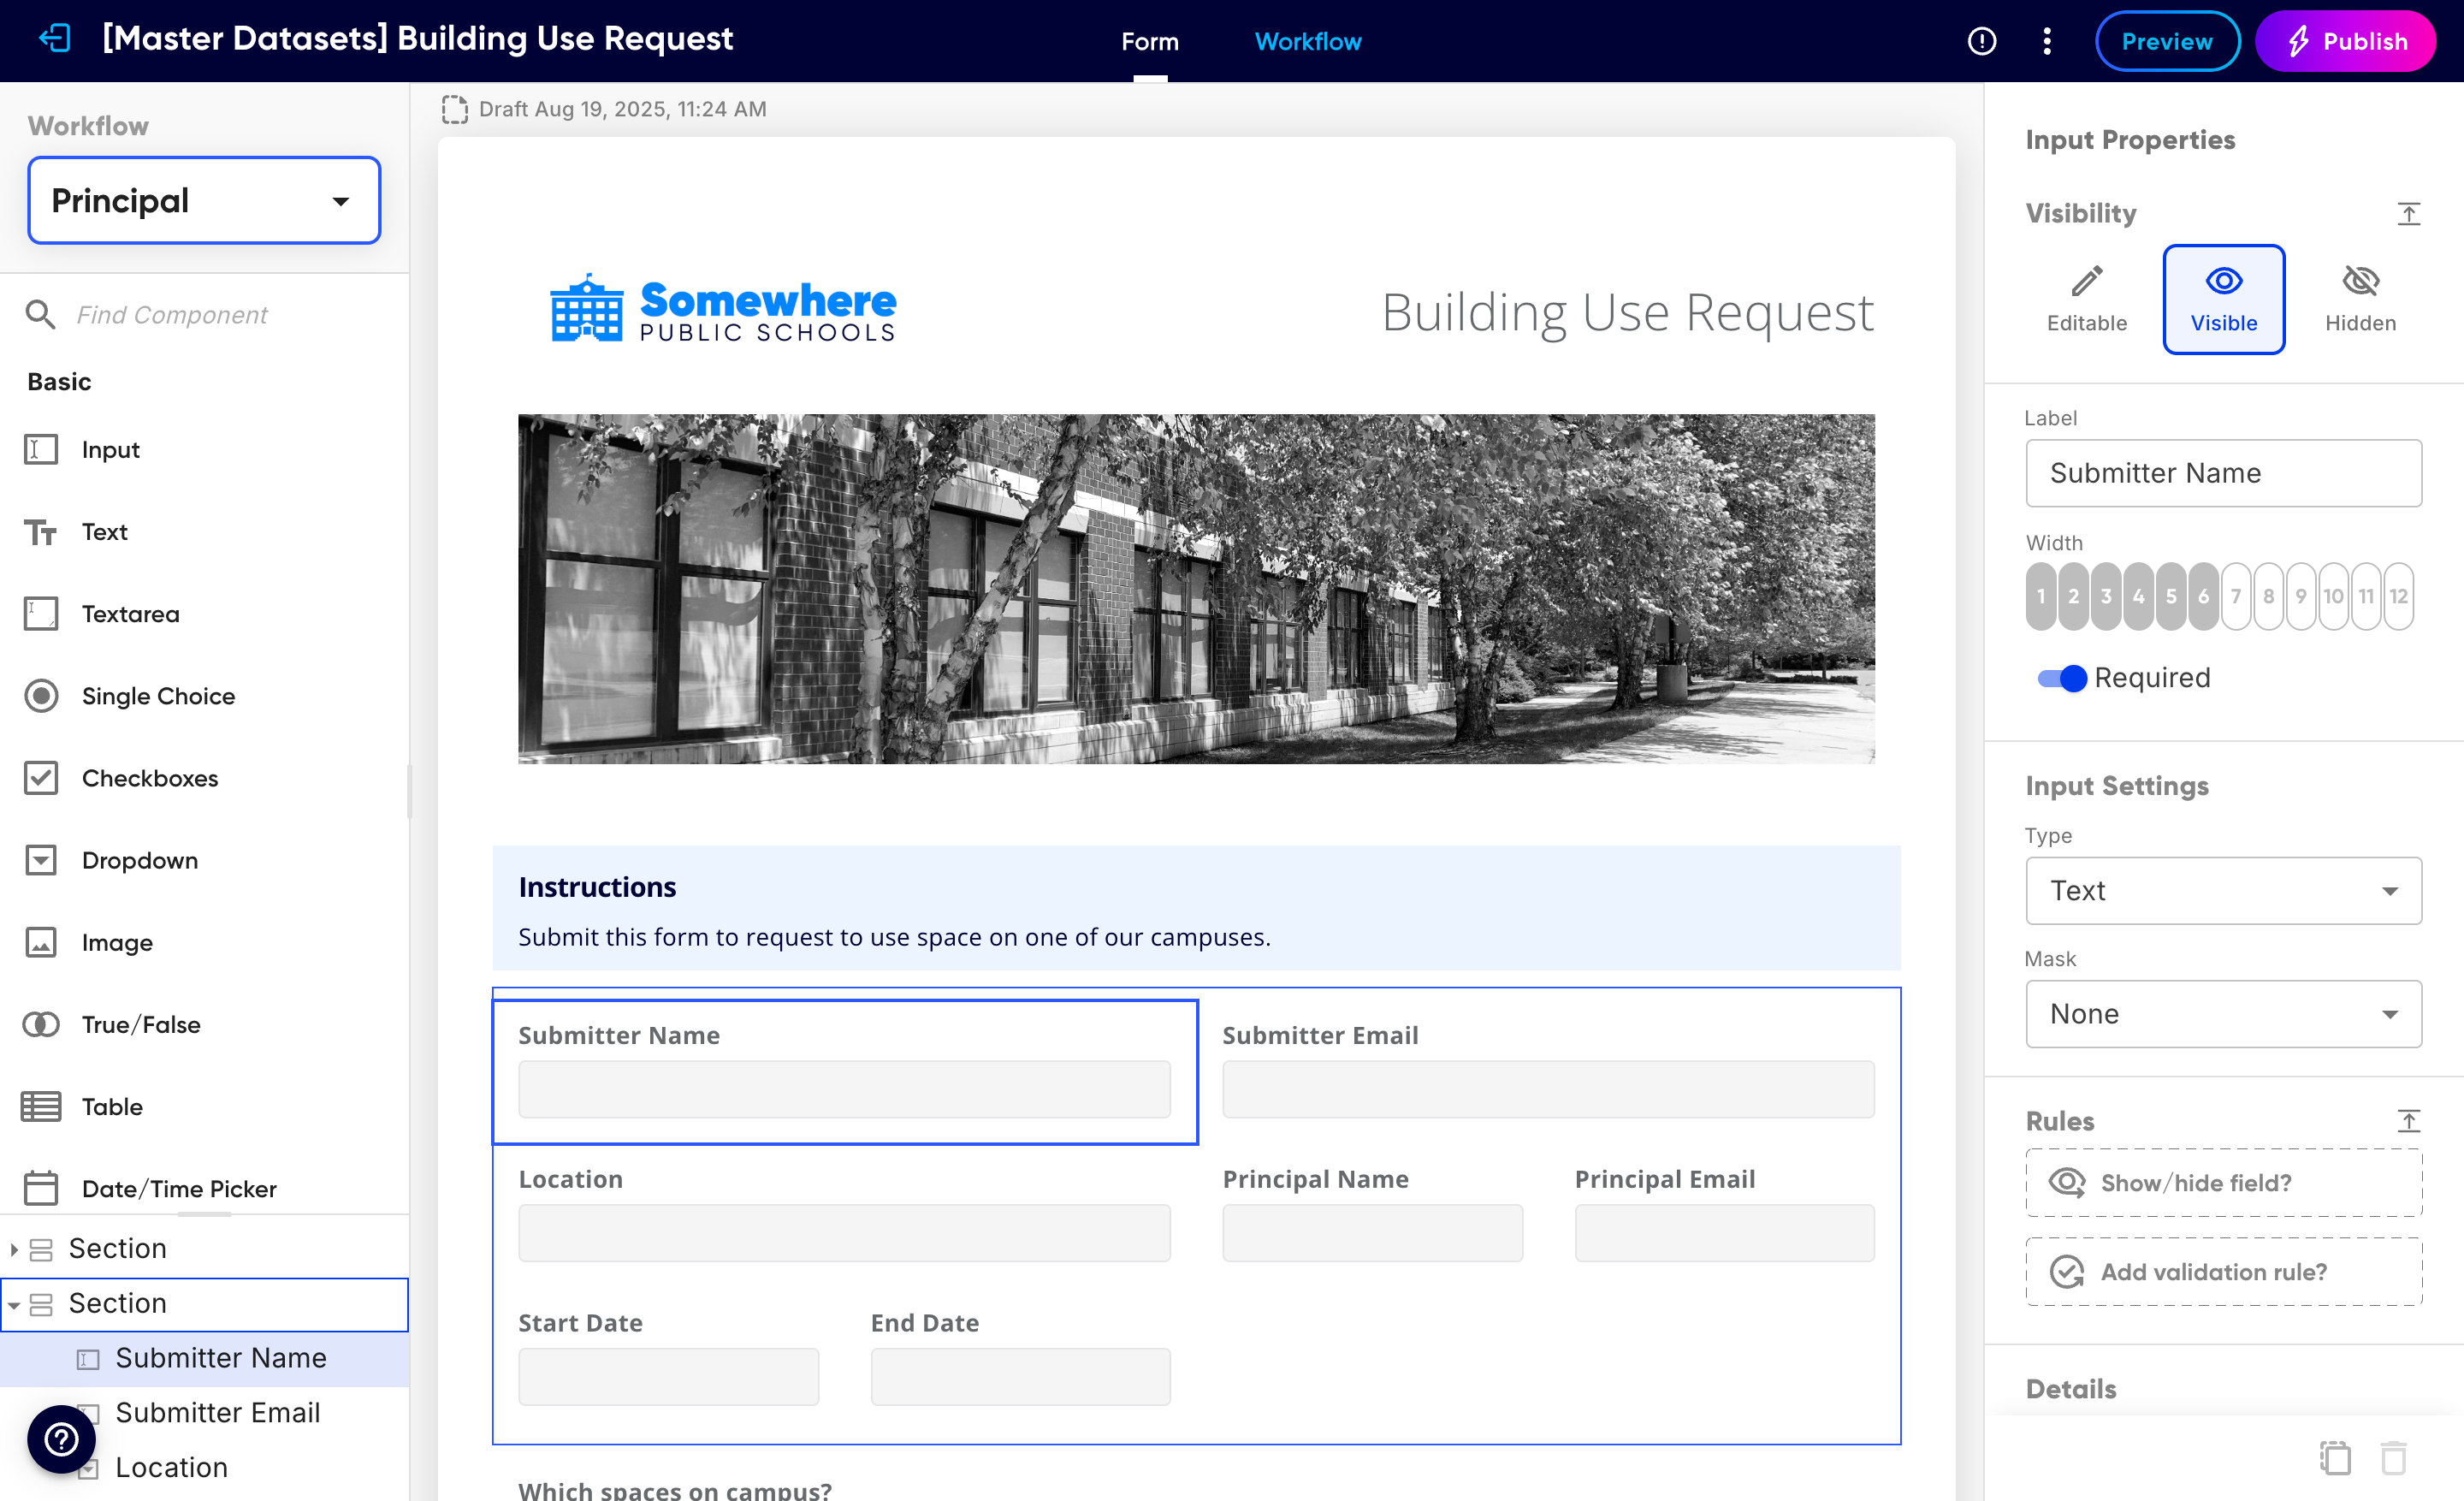
Visible means read-only, not editable. It is the middle setting: the person can look but not touch. If you want them to change the value, choose Editable.
How steps map to people
Every form has a set of workflow steps, and each step is a moment handled by a specific person or role. Visibility is set per step, so setting visibility is deciding what each person sees.
- Start
- The submitter: the person filling out and sending the form. What is Editable here is what they get to enter.
- Your review steps
- Each step you added (for example a Manager or Principal step) is handled by that step's assignee or role. Set what that reviewer can read and what they can fill in.
- Completed and Rejected
- The final states of a submission, after it is approved or denied. Visibility here controls what the finished record shows to anyone who opens it.
Set visibility for one step
The step selector sits at the top-left of the Form tab, under the Workflow heading. Whatever step you pick, the canvas redraws to show the form as that person sees it, so you can check your work as you go.
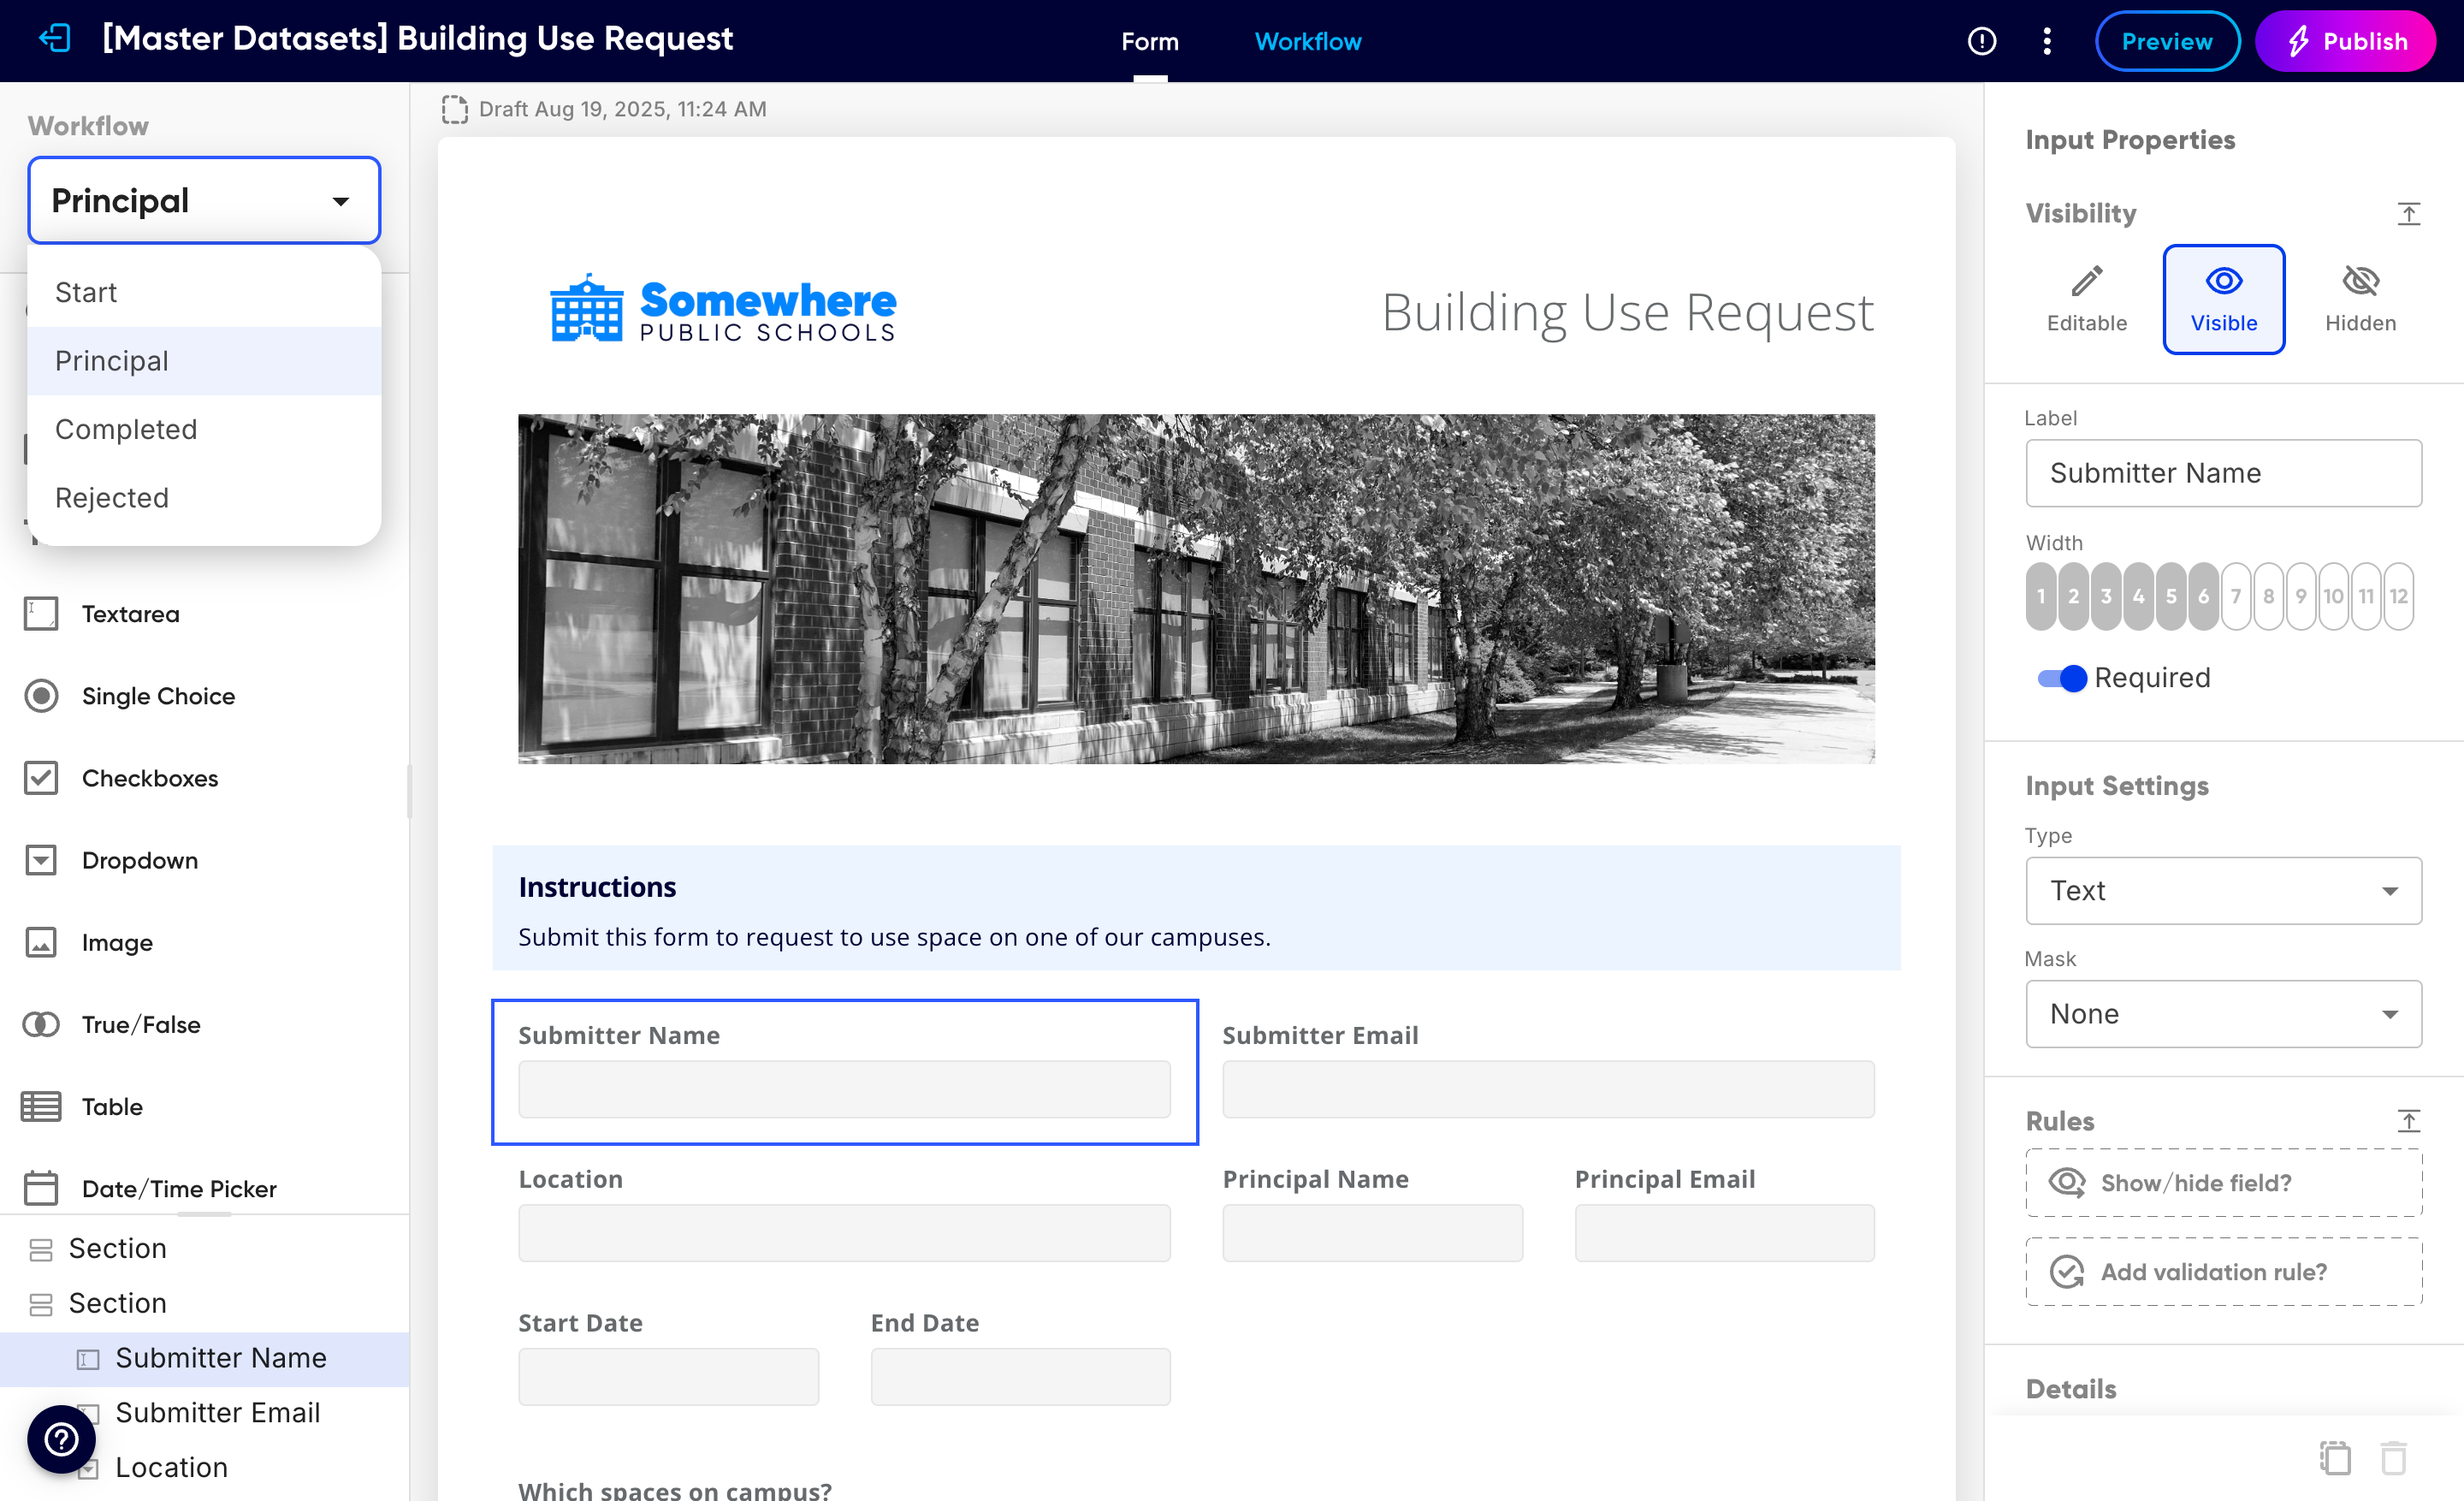
Open the step dropdown at the top-left and choose the step you want to set up, for example your reviewer's step.
Select any field on the canvas. Its properties open on the right, with the Visibility control at the top.
Pick how that field should behave for this step. The canvas updates immediately: editable fields look normal, read-only fields turn grey, and hidden fields disappear.
Work down the form, then switch to the next step and do the same. To see one field across every step at once, use Visibility Mode below.
See and set every step at once: Visibility Mode
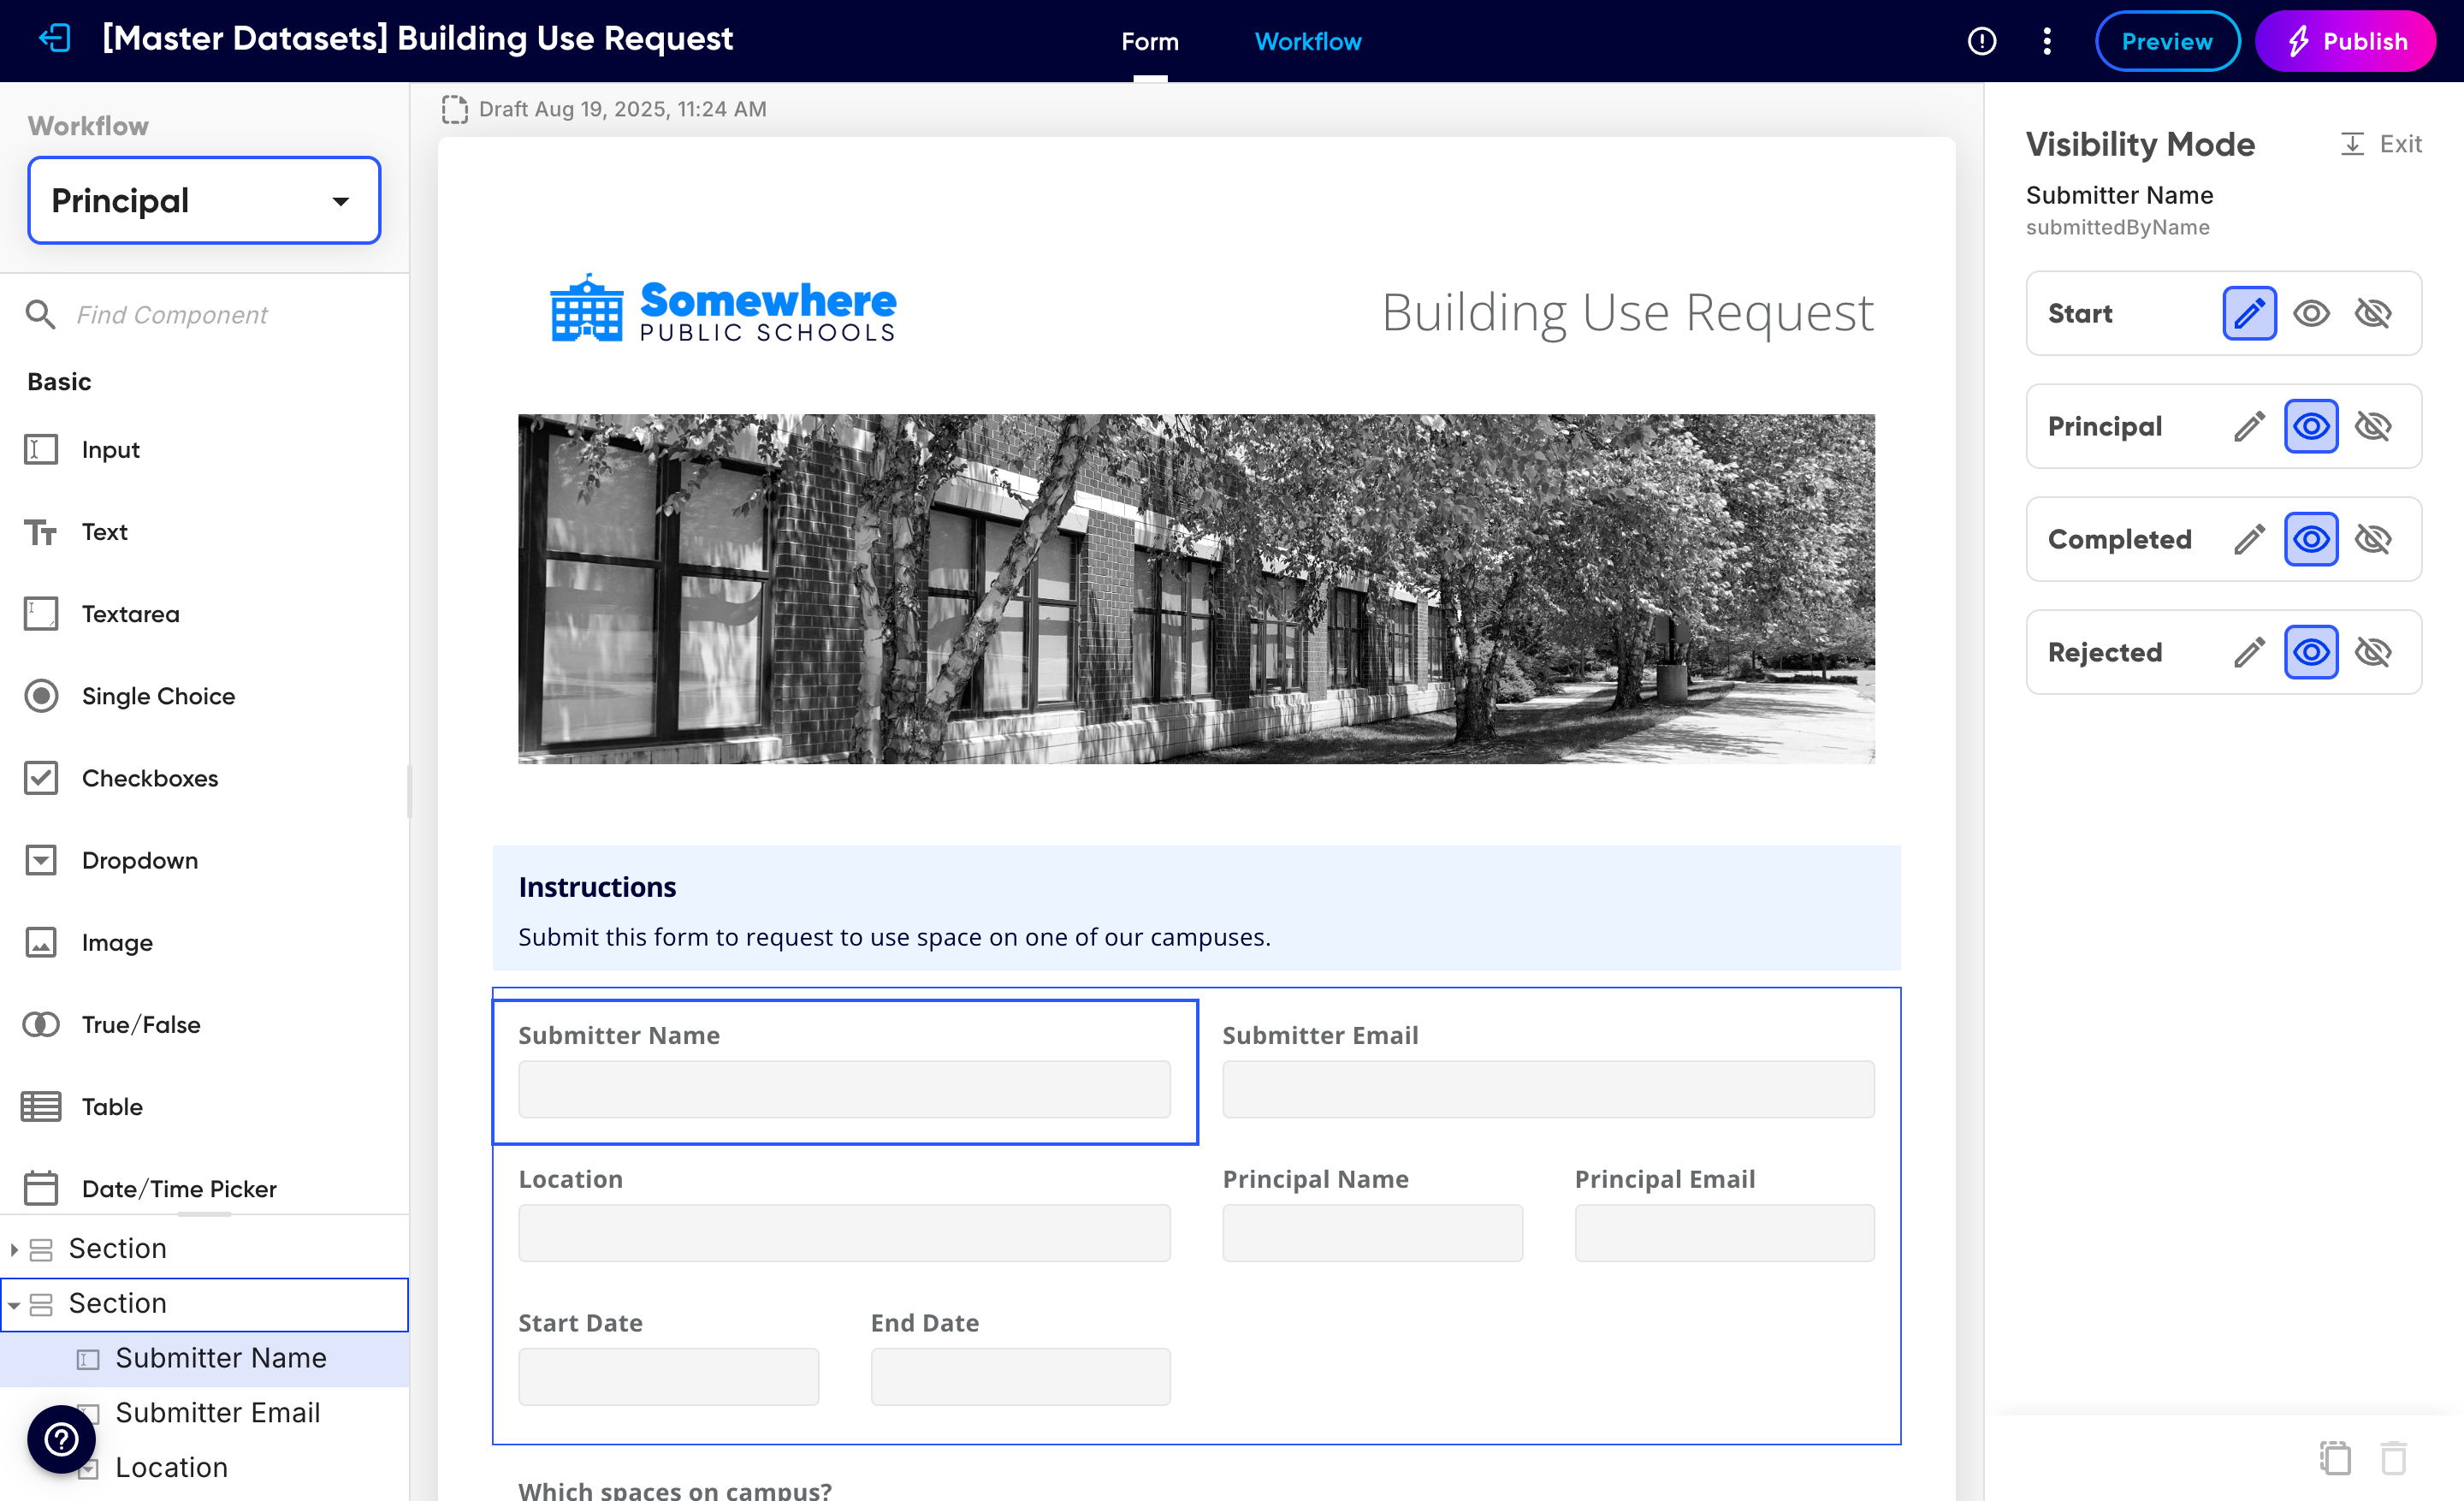
Setting a field one step at a time works, but it is easy to lose track of the whole picture. Visibility Mode flips the view around: pick one field and see its state for every step in a single grid, then adjust any of them in place.
Click the field you want to review on the canvas.
Click the small icon next to the Visibility heading in the properties panel. The panel switches to a list of every step.
Each step row has the same three toggles: Editable, Visible, Hidden. Set them across the whole workflow, then click Exit to return to the normal panel.
A worked example
Take a Building Use Request where a teacher submits and a principal approves. You want the teacher to enter the request, the principal to read it and add a decision, and the submitter's details to stay locked once sent. Here is how the fields line up across the steps.
| Field | Start (teacher) | Principal | Completed |
|---|---|---|---|
| Submitter name and email | Editable | Visible | Visible |
| Requested space and dates | Editable | Visible | Visible |
| Principal decision notes | Hidden | Editable | Visible |
| Internal budget code | Hidden | Editable | Hidden |
The teacher never sees the principal's fields, the principal sees the request as read-only and fills in only their decision, and the finished record shows everyone the outcome while keeping the internal budget code out of sight.
Fields that cannot be editable
A few component types are read-only by nature, so their Visibility control offers only Visible and Hidden, never Editable.
- Computed values
- Computed, Identifier, Timestamp, and Distance fields are calculated for you. No one types into them, so they can only be shown or hidden.
- Sections and Tiles
- Layout containers are structure, not data entry. You can hide a whole Section or Tile for a step (which hides everything inside it), or show it, but a container itself is never editable. The fields inside it still carry their own settings.
Tables need per-column attention. A table's columns each have their own visibility. If you want a column to be editable at a step, make sure the table and that column are both set to allow it, or the column will stay read-only.
A note on action buttons
Review steps also get their own action buttons. On the submitter's step this is the Submit button; on a reviewer's step you will typically see approve and Deny options so they can move the submission forward or send it back. These come from the workflow itself. The terminal Completed and Rejected steps have no action buttons, since the submission is finished. See Configure workflows for how steps route and what their buttons do.
Not the same as Show/Hide rules
It is worth being clear about the two tools, because they look similar but answer different questions.
- Step visibility (this article)
- Depends on who is at the form and which step they are on. A reviewer sees different fields than the submitter, no matter what anyone typed.
- Show/Hide rules
- Depend on the answers given. A follow-up question appears only when an earlier answer calls for it, for the same person, in the moment.
Use step visibility to divide the form between people, and Show/Hide rules to keep each person's view relevant to what they are entering.
Where to go next
New to workflows? Start with Build your first form, which walks through adding steps end to end.
Route submissions through parallel reviewers and conditional paths in Configure workflows.
Make sure each reviewer knows when it is their turn with Workflow notifications.
Show and hide fields based on answers with Show/Hide field rules.