Use integrations
Send submission data out of Droplet to other apps automatically. Connect a workflow step to Google Sheets, Zapier, Power Automate, or your own webhook endpoint.

How integrations work
An integration sends data from a submission to an outside service at a specific point in your workflow. You attach integrations to a workflow step under the Send Data section, and you choose when each one fires: Send When Step Begins (the moment a submission reaches the step) or Send When Step Finishes (the moment it leaves the step). This lets you trigger an external action at exactly the right moment, such as logging a record the moment a submission is approved.
Droplet supports four integration types:
- Google Sheets
- Automatically records each submission as a new row in a connected spreadsheet for real-time reporting and analysis.
- Zapier
- Connects Droplet to thousands of third-party apps through a Zap, so you can do things like create a Trello card or post a Slack message when a submission moves.
- Power Automate
- Connects Droplet to Microsoft 365 tools such as Outlook, Teams, and SharePoint through a Power Automate flow.
- Webhooks
- Sends submission data as JSON to any endpoint you control, for building custom integrations or triggering your own scripts.
Zapier, Power Automate, and Webhooks all work the same way under the hood: Droplet sends an HTTP request to a URL you provide. Google Sheets connects directly to your Google account instead.
Integrations are available on select plans. If you do not see the Integrations tab on your workflow steps, contact your Customer Success Manager to find out whether integrations are included in your plan.
Add an integration to a step
Open the form in the Form Builder and go to the Workflow editor.
Select the step you want to connect, then click Edit Step.
Open the Integrations tab and find the Send Data section.
Choose when the integration should run: click + Add next to Send When Step Begins or Send When Step Finishes.
Select the integration type and fill in its details (see below), then click Confirm.
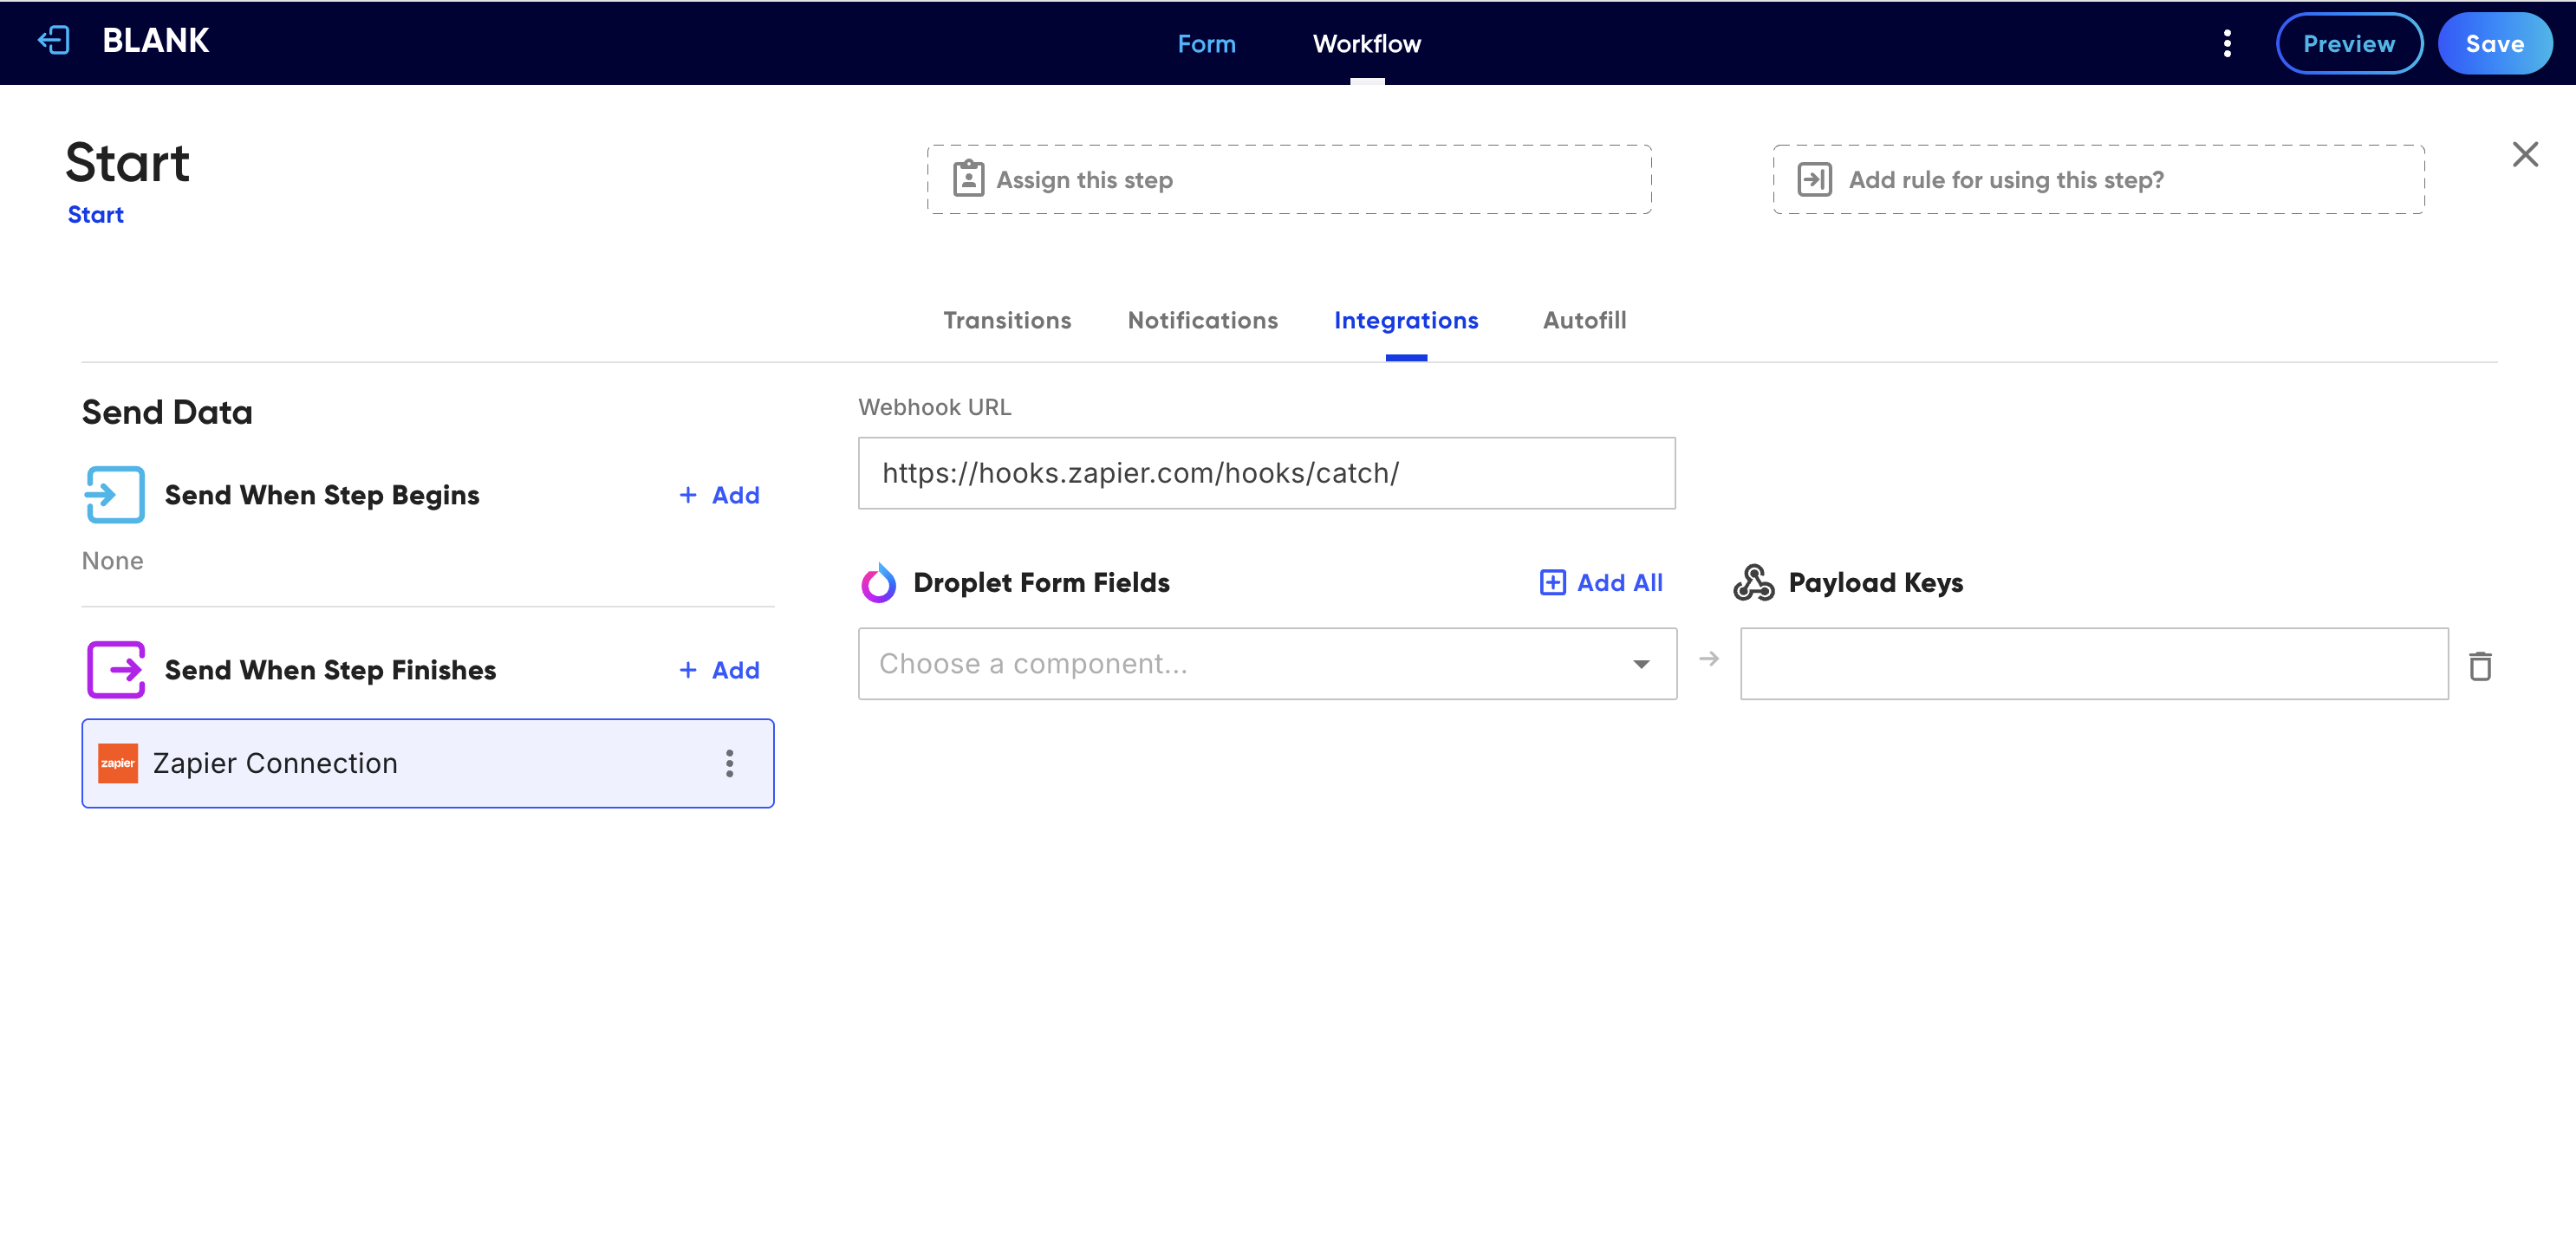 The Send Data section in the Integrations tab. Add an integration under Send When Step Begins or Send When Step Finishes.
Integration settings
For Zapier, Power Automate, and Webhooks, the Edit Integration Details dialog uses the same set of fields.
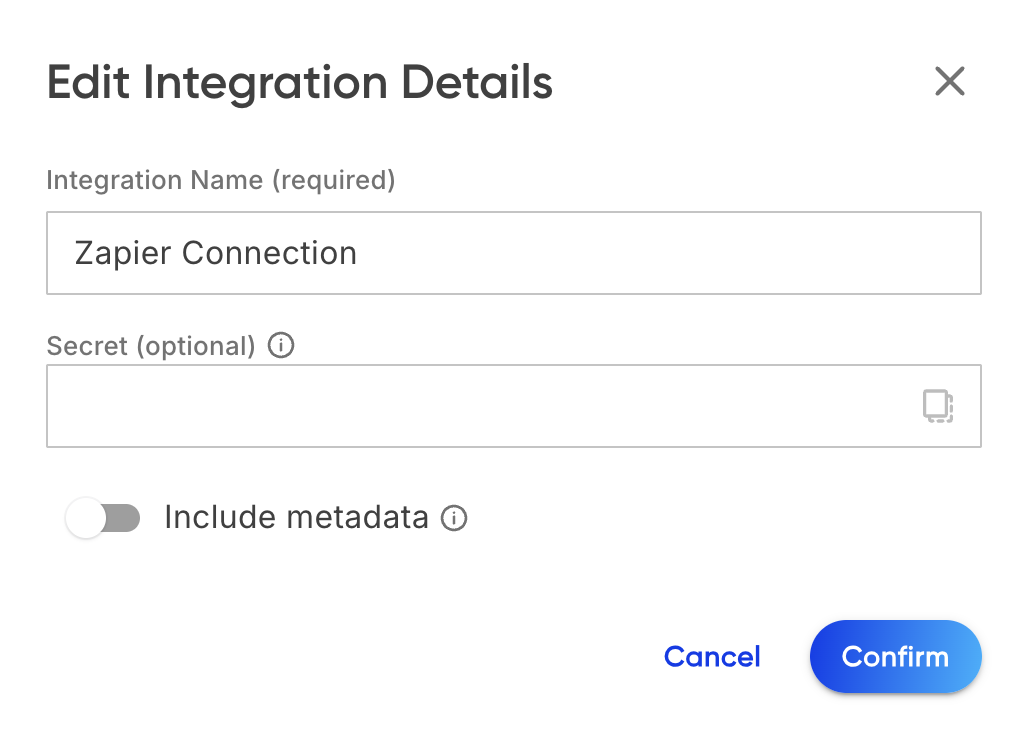
The Edit Integration Details dialog.
- Webhook URL
- The destination Droplet sends the submission data to. Paste the URL from your Zap, Power Automate flow, or your own server.
- Integration Name (required)
- A label to help you recognize this integration later, such as "Approved submissions to Zapier." It is for your reference only and is not sent to the endpoint.
- Secret (optional)
- An optional value used to secure your endpoint. If you provide a secret, Droplet sends it as a
Bearertoken in theAuthorizationheader of the request, so your endpoint can verify the request came from Droplet. The secret value itself is kept in your organization's secret storage, not in the form configuration: the form only stores asecretIdthat points to it. When you publish the form, Droplet checks that every referenced secret still exists, and publishing is blocked if one is missing, so a form cannot go live with a broken integration.
Connect Google Sheets
The Google Sheets integration writes a new row to a spreadsheet every time the step fires.
Add a Google Sheets integration to a step and click Connect.
Sign in to your Google account and grant Droplet permission when prompted.
Droplet creates a new Google Sheet for this workflow and writes a row to it for each submission.
Use the built-in column selector to choose which form fields become columns in the sheet.
Google Sheets is the simplest place to start if you are new to integrations. You get a live, shareable record of submissions without writing any code.
Connect Zapier
In Zapier, create a new Zap and choose Webhooks by Zapier as the trigger, with the Catch Hook event.
Copy the custom webhook URL Zapier generates.
In Droplet, add an integration to your step, paste the URL into Webhook URL, give it a name, and click Confirm.
Map the fields you want to send under Payload Keys.
Submit a test submission so Zapier can capture a sample, then build the rest of your Zap using the incoming fields.
Connect Power Automate
In Power Automate, create a flow that starts with the When a HTTP request is received trigger.
Save the flow to generate the HTTP POST URL, then copy it.
In Droplet, add an integration to your step, paste the URL into Webhook URL, give it a name, and click Confirm.
Map the fields you want to send under Payload Keys.
Run a test submission, then add the actions your flow should take in Outlook, Teams, SharePoint, or another Microsoft 365 app.
Send to a custom webhook
If you run your own server, point an integration at any endpoint that accepts an HTTP POST. Droplet sends the mapped fields as a JSON body. A request looks roughly like this:
POST https://your-server.com/droplet-hook
Content-Type: application/json
Authorization: Bearer your-secret

{
  "employee_name": "Jordan Lee",
  "department": "Operations",
  "amount": 480.00
}
Droplet adds submission details to the JSON alongside your mapped fields, including the submission ID, current assignee, submitter name and email, created date, last updated date, and workflow step ID. Use the Secret field to verify the request: when set, Droplet stores the value in your organization's secret storage and references it from the form by secretId, then sends it as a Bearer token in the Authorization header so your endpoint can confirm the request is genuine before acting on it. If the referenced secret is deleted, publishing the form fails until you supply a valid secret again.
Test your integration
Before relying on an integration in production, send a test submission through the form and confirm it reaches the step where the integration fires. Check that the destination (your sheet, Zap, flow, or endpoint) received the data and that the mapped fields arrived under the keys you expect. Adjust your Payload Keys if anything is missing or named incorrectly.
Because integrations fire when a step begins or finishes, a submission only triggers them when it actually reaches that step. If a test does not arrive, confirm the submission advanced to the right step and that the integration is attached to the correct event (Send When Step Begins or Send When Step Finishes).
Frequently asked questions
Can I add more than one integration to a step?
Yes. You can attach multiple integrations to the same step, and you can set each one to fire under Send When Step Begins or Send When Step Finishes.
Do I need to send every field?
No. You can choose exactly which fields are included, so you can send only what the receiving app needs.
Is the secret required?
No, the secret is optional. It is recommended for custom webhooks so your endpoint can verify that incoming requests came from Droplet. When set, it is sent as a Bearer token in the Authorization header. The value is held in your organization's secret storage rather than in the form configuration, and the form refers to it only by secretId. Droplet validates those references when you publish, so if a referenced secret has been removed, publishing is blocked until you add a valid secret.
Why don't I see the Integrations tab?
Integrations are available on select plans. Contact your Customer Success Manager to confirm whether they are included in your plan.